Treeview is a kind of menu which can be expanded into a number of child menus.
When you got into the child menus, you can find general icons and specific icons.
The general icons are:
 This icon means you are on the intersection between main menu and child menus. You still can expand the menu into child menus.
 This icon means a root of child menu. You can make some specific configuration on this menu.
 This means you choose to make the value in 'yes' condition.
 This means you choose to make the value in 'No' condition.
In FreshUI there is treeview which can be expanding into six main child menu.They are:
 APPLICATIONS
You can use this features to tweak some default windows applications (e.g Notepad,regedit,.etc..)
 Internet Explorer
Use these features to modify some Internet Explorer settings.
IE Menu Settings
Use these features to modify Internet Explorer menus
Use these settings to enable/disable some menu items in Internet Explorer's context menu (i.e. when you right-click an item in Internet Explorer). If you disable option 1, the context menu will not appear when you right-click any item in Internet Explorer. Disabling option 2 will prevent user from using the "Open in New Window" command in context menu (e.g. when you right-click a hyperlink).
You can show/hide some items in Internet Explorer Help menu using these settings.
You can enable/disable some items in Internet Explorer "View" menu item with these settings.
If option 1 is disables, the "Favorites" menu item in your Internet Explorer's menu bar will disappear. Disabling this option also disable "Favorites" button in Internet Explorer toolbar.
IE Toolbar Options
Use these features to modify Internet Explorer default toolbar
You can use these settings to show/hide some default buttons in Internet Explorer toolbar.
You can use these settings to show/hide some default buttons in Internet Explorer toolbar.
You can use these settings to show/hide some default buttons in Internet Explorer toolbar.
IE Connections Tab Options
Use these features to allow/prevent user from changing various settings in Connections Tab in Tools-->Options menu item in Internet Explorer.
IE General Tab Options
Use these features to allow/prevent user from changing various settings in General Tab in Tools-->Options menu item in Internet Explorer.
IE General Tab Options (more)
Use these features to allow/prevent user from changing various settings in General Tab in Tools-->Options menu item in Internet Explorer.
IE Options Tabs
Use these settings to show/hide some tabs in Tools-->Options menu in Internet Explorer. Note: If you hide all tabs in this feature and in "IE Options Tabs (more)" feature, user will not be able to access Tools-->Options menu command in Internet Explorer.
IE Options Tabs (more)
Use these settings to show/hide some tabs in Tools-->Options menu in Internet Explorer. Note: If you hide all tabs in this feature and in "IE Options Tabs" feature, user will not be able to access Tools-->Options menu command in Internet Explorer.
 Media Player
Modify Windows Media Player Settings
Media Player Proxy Configurations
Use these features to tweak your Media Player's Proxy Settings. You can modify HTTP or MMS proxy configuratons with these features.
- Media Player's HTTP Proxy
Use these features to modify your Windows Media Player's HTTP Proxy settings. If proxy type is set to "User-defined", then user can modify HTTP proxy configuration in Proxy settings in Network tab in Media Player. If proxy type is set otherwise, the Configure button in Proxy settings in Network tab is disabled for HTTP protocol. NOTE: proxy address, proxy port and proxy-bypassing settings can only be modified if proxy type is set to "Custom settings".
Use these features to modify your Windows Media Player's MMS Proxy settings. If proxy type is set to "User-defined", then user can modify MMS proxy configuration in Proxy settings in Network tab in Media Player. If proxy type is set otherwise, the Configure button in Proxy settings in Network tab is disabled for MMS protocol. NOTE: proxy address, proxy port and proxy-bypassing settings can only be modified if proxy type is set to "Custom settings".
Media Player Network Settings
If you set media player buffering type to "user defined", you can modify Media Player buffering options on the Performance tab. If you set this option to "Configure Buffer", you must also specify the amount of time for media buffering (in seconds). If you set this option to "Force Default", Media player will user default number of seconds used for buffering. Setting media player buffering type to "Force Default" or "Configure Buffer" will disable the Network Buffering section in Performance tab.
Media Player Options
"Anchor" is a small window that appears in the lower-right corner of the screen when Windows Media Player is in skin/compact mode. Hiding anchor will also disable the checkbox in Tools-->Options-->Player tab that enable user to choose if the anchor is displayed or not. Codecs (Compressor Decompressor), by default, will be automatically downloaded if user tried to play a file that doesn't have associated codecs. You can prevent this automatic download by unchecking option 2.
Media Player Skins
Use this feature to change your Windows Media Player skin. Using this feature, however, will also lock Media Player to the specified skin (user can't change skin from Media Player's menu). To restore your media player skin to default skin (and also allow user to change media player's skin), empty the box and click OK button.
Media Player Window Title
Use this setting to change your Windows Media Player Window title. Fill the field (after activating the form) with your custom title, and click OK button. To restore your media player original title, empty the field and click OK button.
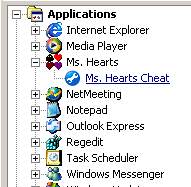
 Ms. Heart
Modify Microsoft Hearts Settings.
Ms. Hearts Cheat
Want to see your opponent's cards? Just check this option, and the next time you play Ms. Hearts press CTRL-SHIFT-ALT-F12 keys altogether to activate this cheat and VOILA! your opponents cards are revealed.
 NetMeeting
Modify NetMeeting Settings.
NetMeeting Audio Settings
If you disable option 1, you will not be able to receive or send audio. If you disable option2, you will not be able to hear incoming audio and speak simultaneously. This setting can be disabled for older audio hardware that doesn't support full duplex mode. Option 3, if disabled, will prevent user from modifying Direct Sound setting (some hardware doesn't support Direct Sound).
NetMeeting Options Page
Use these features to show/hide some tabs in Tools-->Options in NetMeeting.
NetMeeting Sent Files
You can limit the size of files sent over your NetMeeting sessions with this feature. To restore to default value, empty the box and click OK button.
 Notepad
Modify Notepad Settings.
Notepad Options
Some notepad options you might consider changing.
 Outlook Express
Modify Outlook Express Settings.
Outlook Express Layout Options
Use these settings to show/hide some Outlook Express interface controls. Enabling option 1 will show status bar by default. Enabling option 2 will show Outlook Bar (similar to Places Bar in Windows Open/Save Dialog Box) by default.
Outlook Express Toolbar Options
Use these settings to modify your Outlook Express Toolbar appearance. Text Option can be set to show all text, hide all text or show only some text in Toolbar. You can also set toolbar icons to small or large size.
Outlook Express Window Title
Use this setting to modify your Outlook Windows Title. To restore to default value, empty the field an press OK button.
 Regedit
Modify Regedit Settings.
Regedit Last Key
In Windows ME/2000/XP, Windows keeps record of the last registry key viewed/edited. You can clear this record by clicking "Clear Last Active Key" button.
Disable Regedit
You can prevent current user from launching "Regedit" application with this feature. Double click the item in the list and then check the box to enable regedit.
 Task Scheduler
Modify Windows Task Scheduler Settings.
Task Scheduler Restriction Options
These settings are useful to restrict user access to certain Task Scheduler command. Option 1 can be used to prevent user from adding more scheduled task, while option 2 can be used to prevent user from deleting already scheduled tasks.
 Windows Messenger
Modify Windows Messenger Settings.
Windows Messenger Options
Use option 1 to enable/disable Windows Messenger. If you uncheck option 1, Windows Messenger will not run. Normally, Windows Messenger starts when user logs on, but you can prevent this auto-loading by unchecking Option 2.
 Windows Update
Modify Windows Update Settings.
Windows Update Options
Use option 1 to enable/disable auto-update feature in Windows 2000/XP. If you disable auto-update, whenever user connects to the Internet, Windows will not search for updates available for Software/Hardware on the computer. Option 2 can be used to bypass Windows Update Registration Process.
 EXPLORER
Tweak your Windows Explorer using these features. Modify how Explorer handles files/folder/drives as file manager.
 Drives Settings
You can use these features to restrict drive access, hide some drives, etc.
Drives Context Menu
Use this feature to add more command in your drive's context menu (i.e. when you right-click drive icon).
Network Drives
You can use this feature to show/hide "Map Network Drive" and "Disconnect Network Drive" commands in your Windows Explorer menu and Context Menu.
Restrict Drive Access
This feature lets you prevent current user from accessing specified drive. User will no longer able to browse the particular drive(s) using Windows Explorer, "Dir" command, or shortcut from "My Computer". This feature does not hide any drive's icon (the drive icons in My Computer will still be displayed, but user cannot access them with Windows explorer). To hide some drives, you might want to use "Show/Hide Drive" feature.
Show/Hide Drives
You can use this feature to hide your drive's shortcut in My Computer. To hide the desired drive, just double click one of items in the list on the right and check the appropriate box. Note: Hiding drives does not prevent user from accessing them, so if you want to restrict access to some drives, you might want to use the "Restrict Drive Access" feature.
Change Drive Name and Icon
This tweak allows you to change the name and icon shown in Explorer for a specific drive letter. Choose your own icon and label for a specific drive letter. NOTE: The "DefaultLabel" value only works with Windows 2000 and higher. To change back into default value, just clear the icon's and the label's value.
Change Hard Disk Free Space Warning
By default Windows sends an administrative alert when the amount of free space remaining on a hard disk drive falls below 10 percent. This percentage can be configured using this setting.
 Files Settings
Modify how Windows Explorer handles files (unassociated files, file context menu, etc.).
New Context Menu
Use this feature to add more file-type in New Context Menu. Just fill the extension of the file-type you want to add in the box below and press the "OK" button (e.g. "TXT" or".TXT"-no quotes!!)
Any File Context Menu
Use these features to activate more options in the context menu when you right-click ANY files.
File Context Menu
This feature lets you add up to 2 commands in your file context menu (i.e. you right-click a file). For example: You can add "Open with Notepad" command in your fileácontext menu by filling "Open with Notepad" in description field and "notepad.exe %1" in command field (no quotes).
File Encryption Option
Normally, Windows will automatically encrypt files moved to encrypted folders. If you uncheck this option, Windows will not encrypt files moved to encrypted folders on the same drive. Disabling this setting, however, won't affect files that are moved to different drives. Note: This feature only works on NTFS harddisks.
Unassociated File
If you double-click an unassociated file (file that isn't associated with certain application in Windows), usually Windows will prompt you for program to open that file. You can specify what program to run unassociated files with this feature. Just fill the command line (e.g. "notepad.exe %1") or clear to reset.
Manipulate Connected Files as Unit
To enable this option, just checked on the option.
 Folders Settings
Modify how Windows Explorer handles folders (folders context menu, folders encryption, etc.).
Folder Context Menu
You can add up to 2 command in the Folder context menu (i.e. Youáright-click a folder). Fill the "Description" box with your command description (e.g. "Explore from here..") and "Command" box with your command lineá(e.g. "explorer.exe %1").
Folders Context Menu (more)
Use this feature to add more command in your folder's context menu (i.e. when you right-click folder icon).
 HARDWARE
Tweak any hardware's setting using these features, but be careful, for some options can lead you to serious problems if not handled with cautions.
 CD Media Settings
These features handle everything about Compact Disc Media.
Audio CD Default Player
If you want to change your AudioCD default player, activate the form, fill the field with your Audio CD player's filename (full path and necessary parameters should be included) and click OK button. You can also select your previous CD Player from the dropdown list.
CD Burning Feature
If you have a CD Writer Drive, you can use Windows XP's Explorer CD burning features to write/modify your rewriteable CDs by enabling th option below. Note: Disabling this feature won't affect any third party CD-Burning applications (you can still use them to write your CDs).
CD-ROM Autoplay Feature
This setting is used to enable/disable CD-ROM Autoplay feature. If you disable CD-ROM AutoPlay feature, auto-setup programs in CD-ROMs will not be launched as soon as you insert them in the drive. This setting will also affect Autoplay feature for Audio CDs.
 CPU
CPU
Use these features to enhance your CPU performance under Windows Operating System.
L2 Cache Optimization
A lot of computers now have more than 256 L2 cache. You can optimize your Windows performance by setting this value to your CPU's L2 Cache size.
Windows CPU Priority
You can make any program loads faster by modifying the setting below. NOTE: If your computer, after modifying this setting , hangs during start up, just enter the safe mode and use this feature to return theásettings to Default value (Normal priority).
 Mouse
Mouse
Use these features to modify some "mouse" attributes.
Double Click Rectangle
You can define double-click rectangle using this feature. Double-click rectangle is an invisible border which a person can perform double-click. The default value for both fields are 4. To restore these values to default, just clear the fields and pressáOK button.
Mouse Options
To automatically move the mouse pointer to the default button, check option 1. To swap mouse button (left button becomes right button, and vice versa), check option 2. If you want explorer to automatically detect accidental double mouse clicks, check option 3. To control whether trails are shown behind the movement of the mouse pointer, use option 4. Option 5 can be used to increase the size of the buffer, and avoid windows reporting an error relating to an overflow in the mouse buffer.
WheelMouse Scroll Line
Use this feature to change the scroll lines if you are using Wheelmouse. If you set the value to 0 or you leave the field blank, the wheel-scrolláwill be disabled.
Drag Sensitivity
Use this feature to change Mouse Drag Sensitivity (in rectangle form). The default value for both fields are 4. To restore these values to default, just clear the fields and pressáOK button.
Activation follows mouse (X-Mouse)
To enable x-mouse feature just check option 1. X-mouse feature is when you move mouse to an inactive form, it will automatically activate the form. If you want to automatically raise the form, then check option 2. To configure the activation delay just enter number (in milliseconds) in the box.
 Power Policies
In this section, you can configure your power management policies.
Power Management Profile
Use this to set the power management profile for your computer.
Password on Resume
Use this feature to prompt user for password when the computer resumes from suspend/hybernate condition.
Power the Computer Off After Shutdown
This setting controls whether Windows should automatically power down or reboot your computer once it has finished the shutdown process. NOTE: This feature must be supported by the computer's BIOS.
 Keyboard
Use these features to modify your "keyboard" settings. NOTE: To change back into default value, just empty the box in each options.
Keyboard Settings
First option will disable the Windows key that is found between the Ctrl and Alt keys on a Windows enhanced keyboard. Occasionally Windows may report an error relating to an overflow in the keyboard buffer. Option 2 can be used to increase the size of the buffer, and avoid this problem. When running more than one application at a time, you may find that your system's keyboard response is slower. To alleviate this, you can adjust the amount of time allocated to processing keystrokes on option 3.
 Modem and Communications
Use these features to modify your "Modem and Communication" settings.
Speed-up Modem and Serial Connections
Windows is normally limited to a default maximum speed of 115,200 bps for serial communications. By using compression and high-speed UARTS modern modems may reach this limit and not be allowed to operate at full speed. This tweak allows Windows to communicate with speeds of 230400, 460800 and 921600 bps. NOTE: Once enabled open Control Panel->Modems->Your Modem->Properties->General and set the required maximum speed.
Control Network Adapters Response and Load Balance
In computers with multiple network adapters option 1 specifies whether to send all IP addresses or only one IP address in response to a WINS query request. If you want to send only one IP address checked on option 1. Option 2 allows you to distribute the number of connections, or sessions among the adapters according to a randomizing algorithm. NOTE: To enable option 2, check on option 1 first.
Configuring Unimodem Support
NT 4.0 and greater support Unimodem modems, if your device is not supported though Windows can be configured to use the MODEM.INF file instead.
PCMCIA Network Power Management
When using a PC Card network adapter you might not be able to connect the computer to the network, and under Control Panel -> System there is a yellow exclamation mark "!" next to the card. To fix this problem, just disable PCMCIA network power management by unchecking this option.
Random Adapter Responses
For a computer with multiple network adapters, this setting specifies whether to respond with an IP address selected randomly from the range of addresses on the computer or whether to return the IP address of the adapter that the request came in upon.
Enable Network Adapter Onboard Processor
If your network adapter has an onboard processor, designed to offload network processing from the system CPU, it is disabled by default. This setting allows you to enable it and increase the processing speed of your system.
Disable Automatic Modem Connections at Startup
If remote connections are enabled in Windows, the system may try to initiate an Internet connection at Windows startup or at the start of many applications. This setting disables that behavior.
 Printers
Use these features to modify your "Printers" settings. NOTE: To change back into default value, just empty the box in each options.
Printers Options 1
Option 1 disables server support for Internet printing. Internet printing lets you display printers on Web pages so they can be viewed, managed, and used across the Internet or an intranet. Option 2 disables event log for every print job occurring on the spooler. Option 3 will make the print spooler does not send shared printer information to other print servers. When option 4 checked, it will make the machine beep every few seconds when a remote job error occurs on a print server.
Printers Options 2
Option 1 is used to specify the time a network printer should remain in the browse list before it is removed. Option 2 is used to specify the timeout period between broadcasts of a print servers resources.
Define the Scheduler Priority
This setting controls the overall priority of the printer scheduler.
Print Job Notification Messages
By default Windows notifies a user with a popup message that their print job has been completed on the printer. Option 1 controls that behavior. Option 2 controls whether print job notification should be sent to the local computer or the computer that the user first logged on to.
 WINDOWS INTERFACE
Modify your Windows Interfaces (Explorer, Desktop,etc.) with these features.
 Control Panel
You can show/hide some control panel's pages/tabs with these features.
Control Panel Options
Check option 1 (after activating the form) to prevent access to Control Panel. Checking this option also removes Control Panel's shortcut in Start Menu and Windows Explorer. Option 2 can be used to modify your Windows XP Control Panel's style. The "simple" style is the new-styled Control Panel introduced by Windows XP to help users get their works done more easily and quickly.
Hide folders in Control Panel
Use this feature to hide some items/folders in the Control Panel. To hide a folder, activate the form by double-clicking the list on the right, click "Add" button and type the folder name (e.g. "Mouse" or "Printers and Faxes" - no quotes) or the item's file name (e.g. "ncpa.cpl" for Network).
Show Folders in Control Panel
Use this feature to show only the specified folders or applets in Control Panel. To show "Mouse" folder only, for instance, activate the form, click Add button, type "Mouse" (no quotes) and click OK button. NOTE: if you specify the same folder in "Hide Folders in Control Panel" feature, that folder will be hidden (this feature's settings will be overridden).
Add/Remove Programs" Tabs
You can show/hide some tabs/buttons in Control Panel-->Add/Remove Programs Control. Just check the box (after activating the form by double-clicking one of items in the list) to show the tab/button, and uncheck to hide it. Note: Support Information is a link provided by some application's installer to reach their support site. You can hide this link (located in the application's description in "Change/Remove Program s" section) by unchecking option 4
"Add New Programs" Sections
These settings can be used to hide some sections in "Add New Programs" page in "Add/Remove Programs" in Control Panel. Uncheck option 1 to prevent user from using "Add New Programs" to install programs from CD-ROMs or disks. Unchecking option 2 will prevent user from using "Add new programs" to connect to Windows Update. These settings, however, does not prevent user from installing programs using other tools or methods.
"Display" Tabs
You can show/hide some tabs/buttons in Control Panel-->Display Control. Just check the box (after activating the form by double-clicking one of items in the list) to show the tab/button, and uncheck to hide it.
"Network" Tabs
You can show/hide some tabs/buttons in Control Panel-->Network Control. Just check the box (after activating the form by double-clicking one of items in the list) to show the tab/button, and uncheck to hide it.
"Passwords" Tabs
You can show/hide some tabs/buttons in Control Panel-->Password Control. Just check the box (after activating the form by double-clicking one of items in the list) to show the tab/button, and uncheck to hide it.
"Printers" Tabs
You can show/hide some tabs/buttons in Control Panel-->Printers Control. Just check the box (after activating the form by double-clicking one of items in the list) to show the tab/button, and uncheck to hide it. NOTE: option 4 is used to show/hide "Browse for a printer" radiobutton in Windows 2000/XP Add Printer Wizard. Option 4 doesn't require you to logoff.
"System" Tabs
You can show/hide some tabs/buttons in Control Panel-->System Control. Just check the box (after activating the form by double-clicking one of items in the list) to show the tab/button, and uncheck to hide it.
 Desktop
You can modify your desktop's style with this features. Use these features to modify visible icons, wallpaper style, shortcuts, etc.
Active Desktop
Use these features to modify your Active Desktop settings.
Enabling option 1 will activate Active Desktop and prevent user from disabling Active Desktop. Option 2 works the opposite way of option 1. If you enable both options, option 2 will be ignored. If you uncheck option 3, HTML files cannot be set as wallpaper. This option (if unchecked) will let user to change his/her wallpaper using only bitmapped (*.bmp) files.
- Active Desktop Restriction Options
Option 1 can be used to prevent user from adding new web page or pictures to the desktop. Unchecking option 1 will disable "New" button from Web tab in Display in Control Panel. Unchecking option 2 will disable "Delete" button in the Web tab in Display in Control Panel. Unchecking option 3 will disable "Properties" button in Web tab in Display in Control Panel. If option 4 is disabled, the item's checkboxes in Web tab in Display in Control Panel are removed so user cannot close any item.
Desktop Themes
Use these features to modify your Desktop Theme settings
These options can be used to disable dropdown lists on the Appearance tab in Display in Control Panel.
You can use this feature to display/hide some default icons on your desktop. Just activate the form by double-clicking one of items in the list and check the appropriate box and press OK button.
Icons
Modify Icon names, Icon tips, default Icons here.
This feature can be used to change your icon's dimension on your Desktop. Normally, the icons on the Desktop are displayed with the size of 32x32 pixels. Note: If you change this value, the icons size in Start menu will also be affected.
Use this feature to change Icon tips. Icon tips is the tips displayed when you move the mouse pointer over some icons. This requires ActiveDesktop.
You can change those standard Icon names with whatever you like. This can only change the icon's name on your desktop.
Normally, if you right-click My Documents icon, you can change its target path. You can prevent that change by unchecking the option below.
- My Network Places Options
Disabling these options will remove the corresponding icons in "My Network Places". Removing those icons, however, will not prevent user from connecting to other computers using other third party applications.
- "Properties" Context Menu
You can remove the "properties" command in My Computer, My Documents, or Recycle Bin's context menu (when you right-clicked those icons). Double-click one of items in the list and uncheck the appropriate boxes to hide the "properties" command.
You can use this feature to change your Recycle Bin's Icons. First, choose the Recycle Bin's state icon that you want to modify (Recycle Bin has two states : empty and full; You can set different files or icons for each state). Next, you can type your icon's filename and press Enter or you can click the ".." button to browse. Once the icon filename has been set, a set of icons contained in that file will be displayed. After choosing which icon to use (by clicking one of the icons), click OK button.
This feature lets you modify the Recycle Bin's context menu (i.e. when you right-clicked Recycle Bin). Press F5 key on your desktop to see the changes.
Screen Saver Settings
Screen Saver Settings (enable screen saver, screen saver password, etc.).
If you disable option 1, screen saver will not work. Disabling it will also prevent you from changing the screen saver options. Enabling option 2 will protect all your screen saver with password and disable "Password protected" check box on "Screen Saver" tab in "Control Panel"-->"Display". Screen Saver Timeout is the time value (in seconds) which Windows uses to wait (in idle state) before launching screen saver
If you forget your screen saver password, click the "Delete Screen Saver Password" button.
Shortcuts
Shortcut settings. Use these features to change shortcut's attributes (arrows, prefixes, etc.) .
To enable/disable link file's, pif file's and url file's shortcut arrow just check/uncheck options below. Note: On some systems (especially on Windows 9x), removing shortcut arrows will also disable all preset keyboard shortcuts.
You can omit the prefix "Shortcut to.." that Windows adds when you create a shortcut. Double-click the list on the right and uncheck the checkbox to omit the prefix.
Wallpaper
This part features tools for modifying Wallpaper style and wallpaper's location.
Unchecking option 1 will prevent user from changing wallpaper and wallpaper style using the "Display Properties". But even if you uncheck this option, you can still modify your wallpaper style using "Wallpaper Style" feature in this program.
Use this feature to modify the appearance of your Windows wallpaper.
Use this feature to change the location of your wallpaper (all measures are in pixels). To return to the default values, just clear the fields and press OKábutton.
Desktop Restriction Options
Option 1 should only be disabled if you are absolutely sure you don't need any network functionality, because hiding "Network ..." icon can lead to serious problems. Enabling option 2 will hide all icons on your desktop and also restrict your access to desktop. If option 3 is disabled, Windows will not save any desktop's changes such as windows/taskbar positions. Shortcuts placed on the desktop, however, will still be saved.
 Explorer Interface Settings
Some useful settings about Windows Explorer including toolbar, "file" menu, "classic" style explorer, etc.
"Classic" style Explorer
Use this option to change the explorer to the "good-old-fashioned" explorer style. If enabled, however, you will lose the some features of yourá"new"-styled explorer.
Explorer Menu Options
Use option 1 to show/hide "File" menu in explorer. If option2 is disabled, the context menu (i.e. when you right-click any object in Windows Explorer) will not be displayed. Option 3 can be used to show/hide the "Folder Options" command under "Tools" menu. To show/hide "Search" button, use option 4. Option 5 can be used to hide "Manage Item" command in context menu when user right-clicks My Computer Icons.
Explorer/Shell as Separate Process
Enabling this option will separate your explorer as file manager and as system shell. The result is more stability but enabling this option will also consume more memory.
Explorer Toolbar Picture
You can change the background picture of Windows explorer toolbar using this feature.
Explorer Other Options
If you want to hide "Shared Documents" icon in Windows Explorer (when you double-click My Computer), uncheck option 1. Thumbnail pictures cache is a cache created when you switch your explorer's view settings to Thumbnails. This feature is useful especially when your computer is used by number of users and you don't want other user to see your thumbnail cache. Unchecking option 3 will remove "Hardware" tab in local drives Properties dialog box.
Color Settings
To change Hot-tracking and compressed files color, just double click on the options. Then select the color by clicking on the Box.
Windows Interface Settings
Some Windows appearance that you can modify. These features can be safely tinkered and will only affect the visual quality of your system.
Windows True Type Fonts Options
Check option 1 to enable TrueType fonts. Enabling option 2 will force Windows to use only TrueType fonts (this can yield to strange dialog Windows)
Windows Border Width
Use this feature to change window border width. The maximum value is 49. In some systems, the default value is -15 and if you want to restore your windows border width, just fill the box with -15.
Windows Visual Effect (1)
Enabling option 1 will make the keyboard shortcut (underlined character in menu items) visible even if you don't press "Alt" button (If uncheck, you have to press Alt button to see the underlined characters). Other options can be used to modify the animation effect of menus,combo boxes and list boxes.
Windows Visual Effect
Check option 1 to enable window animation when you minimize window/restore window from taskbar. If you uncheck option 2, only the outline of window will be displayed when you drag a window. Option 3 can be used to give a smooth scrolling visual effect (but also consumes resources).
Windows Visual Effect (2)
To make cursor shadow, check on option1. Option 2, 3 and 5 will give you fading animation for menu, menu selection, and tooltip. To enable tooltip animation check on option 4.
Windows Visual Effect (3)
To enable mouse hot tracking effects, check on option 1. And to show Windows version on desktop, just check on option 2.
 Start Menu
Use this features to modify start menu on the taskbar. You can show/hide some items.Add cascaded menus, .etc.
Cascaded Menus in "Start"
To activate cascading menu (above the 'program' in 'Start' menu), check the corresponding box. NOTE: In Windows XP, you must set the start menu style to "classic" start menu (modify taskbar properties or use "Windows XP Start Menu" settings) to see any changes.
Expanded Menus
Expanded menus will act like a common menu (contents are unfolded when you point a menu item), while non-expanded menus will act as links/shortcuts (you can see the contents after clicking a menu item). Expanded menus are similar to "Cascaded Menus", but expanded menus are not placed above "Programs". NOTE: On Windows XP, these settings can only be applied to "classic"-styled Start Menu.
Maximum Number of Document Shortcuts
You can set the maximum number of recent document shortcuts in "Start Menu". To restore to default value (maximum number : 15), empty the box and press Ok button.
Menu Reaction Delay
Use this feature to change the delay time when you click "Start" menu. Changing the delay time to 65535 will make the system waits for mouse click before a menu is unfolded.
Show/Hide Items in Start Menu
You can hide some menu in "Start" menu using these features. Just uncheck the corresponding box to hide specific item. NOTE: in Windows XP you need to set the taskbar to "classic" style to see the changes.
Show/Hide Items in Start Menu (1)
Continued options from show/hide items above.
Show/Hide Items in "Documents"
Use these settings to show/hide some items in "Start-->Documents" menu. To hide items, just activate the form (double-click one of item in the list on the right), uncheck the corresponding boxes and press OK button.
Show/Hide Items in "Setting" Menu
With these features, you can hide/show some menu in "Start-->Settings" menu. In Windows XP/2K, you might find the locations of the menus a little bit different (e.g. "Windows update" is not in "Setting" menu,or the "folder options" actually is located in the explorer toolbar).
Windows XP Start Menu
Option 2 and 3 can only be applied to Windows XP "New-Styled" start menu. "Classic" start menu is Win9x/NT/2000-styled start menu, therefore, enabling this option will disable all other options in this feature. Option 2 and 3 do pretty much what they say :).
 TaskBar Settings
Use these features to modify your taskbar settings.
Flash TaskBar Options
Usually, if a non-focused application is being updated by its process, taskbar will flash that application several times to notify the user. You can change how many flashes should be performed (setting this value to 0 will cause Taskbar to flash until clicked). If you uncheck option 1, any flashing Window will automatically get focus.
System Tray/Notification Area Options
Enabling option 1 will enable system tray (located in far right end of the taskbar) and all notification icons will be displayed. Disabling it will hide all notification icons but system clock. Option 2 is used to show/hide clock in system tray.
TaskBar Context Menu
Use this feature to enable/disable all taskbar context menu (i.e. when you right-click taskbar, buttons on the taskbar, clock, system tray, start menu).
TaskBar Options
If you disable option 1, you will not be able to add toolbars on your taskbar (the options under Toolbar command when you right-clicked your taskbar will be grayed). Disabling option 1 will not affect toolbars already set prior tweaking. Option 2 is used to enable/disable task grouping. Normally, Windows XP groups similar applications into one button in the taskbar. If you disable this option, similar launched applications will not be grouped.
 WINDOWS SYSTEM
These features are used to enhance system performance, including file systems, swap file setting,etc. NOTE: Use them with EXTRA cautions. Some settings should only be changed by expert users.
 Advanced System Settings
Use these features to tweak your Windows System Settings, but as always, be careful before modifying (saving your current Windows settings is recommended before you make any changes).
Advanced System Setting
Option 1 (if checked) will enable Windows to beep. Option 2 (if checked) will enable Windows to log errors caused byáapplications in file FAULTLOG.txt in your windows folder. Option 3 (for Windows NT), if checked, will enable fast reboot by pressing CTRL+ALT+SHIFT+DEL keys altogether.
Low Level Hook Timeout
If a program doesn't return control to Windows within value assignedáto Low Level Hook Timeouts (in miliseconds), Windows will terminate that program. This is useful to increase system stability.
Spare Stack Pages
Use this feature if you encountered 'there are no spare stack pages'áerror message. Start with value 4 and if the error message still occurs, increaseáthe value by increments of 4 (e.g. 8,12,16,..etc).
Windows Application Priority Settings
Active application is the application you are working right now (in this case, it's FreshUI :)). With this feature, you can set so the foreground (active) application has more of the system resources than the background applications. This, however will cause the background applications to run slower. Setting this option to "normal" will make all applications have equal priority.
File Systems
Use these features to modify some file system settings (32bit access, DMA buffer, "~" filenames, etc.). These features should only be used by experienced users.
Windows Installation Locations
Use these features to modify various Windows installation locations (Windows recent installation sources, Windows Service Pack installation source, etc.).
- Windows Installation Source
Use this feature to change your Windows Installation source. If you leave the "Windows Installation Source" box blank, the installation source path will be the location used the last time Windows Setup was run.
- Windows Recent Installation Sources
Recent installation directories can be modified here
- Windows Service Pack Installation Source
Use this feature to change your Windows Service Pack Installation source. If you leave the "Windows Service Pack Installation Source" box blank, the installation source path will be the location used the last time Windows Service Pack Setup was run.
32 Bit Disk Access]
You can disable/enable 32 bit Disk access in this feature. Use this option with CAUTION. You should only disable 32 bit Disk access for troubleshooting.
Deleted Files
If you enable this setting, deleted files will not be placed in Recycle Bin. This means that everytime you delete files, they will be permanently deleted.
DMA Buffer Size
This feature can be used for increasing/decreasing 16 bit Direct Memory Access buffer size. Increasing this value to maximum 64(KB)áwill usually lift system performance up. Default value : 16 (KB) ; Optimum value : 64 (KB).
Dos File Names with "~"
If you're sure you don't need any DOS short file name (8+3) you canáuncheck the box, but use this feature with CAUTION!!. Normally, Windows will create DOS short filename (using ~ character)ááfor long file names. Disabling this feature can affect compatibilityáwith older applications
File Allocation Cache
The fragmentation in Windows9x can be reduced by increasing fileáallocation cache. This is useful if you have large-capacity harddisk and you often workáwith large files.
I/O Memory Cache
Normally, Windows limits the amount of RAM used for I/O operations. But you can modify default Windows setting using this feature. Note: You'll have to experiment to achieve best setting.
Low Disk Space Notification
You can use this feature to disable/enable Low Disk Space Notification. Just check the desired drive box to disable Low Space Notification.
Recycle Bin Maximum Size
Use this feature to limit the maximum percentage of disk's space used by Recycle Bin to temporarily hold deleted files. This setting will be applied to all volumes.
Virtual Memory Advanced Setting
Enabling this option will force Windows to fully utilize physical RAMábefore using Virtual Memory (aka "Swap file"). Since physical RAM is much faster than Swap file, enabling this optionácan enhance your system's performance. Recommended for user with 128 MB RAM or more.
UDMA/66 Mode
Use this option to enable/disable UDMA/66 transfer mode. Enabling UDMA/66 mode will result a better hard-disk performance, provided your IDE Hard-disk supports this transfer mode.
Windows 2000/XP File Options
Normally, Windows updates "Last access" file attributes every time a user access that file. You can disable this setting if you're sure that you don't need this feature. Disabling this option can improve system performance. Option 2 can be used if you want to create a legacy filename(DOS 8+3 filenames) using non-standard characters. This, however, only works on NTFS-partitioned Harddisks.
Windows File Protection Options
Windows File Protection (WFP) is a service found in WIndows 2000/XP that protects your critical system files from being altered by some application installer. Disabling (unchecking) option 1 will turn off WFP feature (this is not recommended). Option 2 can be used to set the amount of Disk space (in MB) used for storing/caching your system files. The default value for this option is 4294967295 MB. Option 3 can be used to modify WFP cache location (i.e. folder for WFP to store your system/crucial files).
Windows File Protection Scanning Frequency
Windows File Protection (WFP) is a service found in Windows 2000/XP that protects your critical system files from being altered by some application installer. Normally, WFP will only scan system files during installation procedure, but you can change it so WFP scan system files everytime you start your computer (this, however, will slow down you start up process).
 Network Settings
Various network settings can be modified here.
File and Print Sharing Options
Use these options to allow/disallow file and print sharing in your network connection. Just uncheck the appropriate checkbox to disable file/print sharing and check to enable file/print sharing.
Network Connections Administrator Options
This feature only supported on Windows XP. If you enable this option, any restriction settings in "Network Settings" section ("Network Connections Menu Options", "Network Connection Options", "TCP/IP Restriction Options", etc.) will also be applied to administrators.
Network Connections Menu Options
Option 1 can be used to enable/disable "Advanced Settings" menu item under "Advanced" in Network Connections. Option 2 do the same thing as option 1, except it disable/enable "Dial-up Preferences" menu item.
Network Connections Options
If you disable option 1, user will not be able to click Enable/Disable in context menu. Option 2 can be used to prevent user from accessing the properties command in LAN Connection context menu. If you disable option 3, the checkboxes for enabling/disabling LAN components are disabled, therefore, user cannot change those components status. Option 4 can be used to enable/disable "Status" command in LAN connection context menu.
Network Connections Options (more)
If you disable option 1, the Install and Uninstall button in General tab in Local Area Connection Properties page will be disabled, therefore, user cannot install/uninstall components. NOTE: Under Windows 2000, disabling this option will also disable "Optional Networking Components" menu item under "Advanced" menu in Network Connections.
Offline Files Action on Server Disconnect
This feature determines whether network files can be accessed locally if the computer is suddenly disconnected from the server. If you choose "Work Offline", user will be able to work offline. If you choose "Don't work offline", user will not be able to work offline. If you choose "User-defined", user will be able to work offline, and also user can change this option in Windows Explorer, in Tools-->Folder Options-->Offline Files-->Advanced section.
Offline Files Tab
If you uncheck option 1, the "Offline Files" tab in Folder Options dialog box will be removed. This will prevent user from modifying or viewing the options on Offline Files tab. If you want to disable "View Files" button located in "Offline Files" tab, just uncheck option 2.
RAS Options
These are some Remote Access Services settings that you can modify. Enabling option 1 will make your connection to your remote host (e.g. your ISP) stay alive even when your connection is idle. Option 2 can be used to force Windows to log every connection established. The log file can be found at "%SystemRoot%\system32\ras\device.log"
TCP/IP Restriction Options
If you disable this setting, the button "Advanced..." in General tab in Internet Protocol (TCP/IP) Properties will be disabled.
 Security
These are all about securing your Windows system from unwanted actions performed by reckless users.
Allowed Specified Applications
This feature can be used to restrict applications so that only allowed applications can be run under Windows Explorer. To use this feature, activate the form, click the "Only Allow..." checkbox, click Add button and enter the application file name (don't include full path). NOTE: if the same application is specified in "Prevent Specified Applications" feature (e.g. you add "Notepad.exe" to both features), the settings in this feature will be overridden (you will not be able to run notepad.exe).
Dos Box
You can prevent current user from running DOS box (command.com) using this feature. In Windows 2000/XP, you can set if the system will run any batch file (*.bat, *.cmd). NOTE: Preventing batch files from running will disable your Windows logon script.
Prevent Specified Applications
This feature is useful to prevent running some applications started by Windows Explorer process. To activate this feature, activate the form and check the "Prevent..." checkbox. You can create a list of "forbidden" applications by clicking the "Add" button, and enter the application executable file name (Important note: Just enter the filename, don't include full path. For example : "winword.exe", "freshui.exe", "myapp.exe" are valid entries; while "C:\MyApp\freshui.exe" is not a valid entry.
Windows Installer Security Options
Use this setting with cautions, because enabling option 1 will let Windows installer to elevate all programs privileges so all programs can have access to restricted directories during installation process. NOTE: Some highly skilled users may use this settings to change their privileges and get permanent access to restricted directories/files.
StartUp/ShutDown
Tweak the startup/shut down process of your computer with these features. Enable/Disable startup programs with AutoRun Feature, speed up shutdown process, change boot up/shut down pictures, etc.
ShutDown
Use these features to modify Windows actions during/before shutdown process.
Check the box to activate options or uncheck to deactivate Logoff menu options.
If this setting is enabled, Windows will automatically ends all "not responding" applications during shutdown process. If this setting is disabled, Windows will ask for your confirmation before closing any hung applications.
Cache write delay is used by Windows to determine how long beforeáwriting the cached file to "real file". If you set this value too high, you might loose some informationáwhen your computer shuts down. To reset to the default value, clear the field and press OK.
- Clear Recent Documents on LogOff
This feature will clear all recent items when the user logoff/shut down the computer.
- Delete Swap File at System Shut Down
If this option's enabled, Windows will delete swap file whenever the system is shutting down. For security matter, this option should be enabled on multi-users computer.
- Enable Verbose Status Messages
This feature is useful for troubleshooting purpose and only advanced users can take benefit from this feature. If you enable this setting, instead of displaying "Windows is shutting down.." message, Windows will display every action taken during shutdown process.
Use this setting to speed up restart/shutdown process
Normally, Windows 2000/XP will not display any logoff script commands during logoff process, but you can change this behavior by unchecking this setting. This feature is most useful for troubleshooting purposes.
You can change the shutdown pictures with this feature. NOTE: picture must be in BMP format with dimension of 320x400ápixels and color depth of 256.
- ShutDown/Logoff Status Messages
If you disable/uncheck this option, Windows will not show user the message to wait while their system shuts down or while users log off. By default, this option's value is enabled (checked).
StartUp
Use these features to modify Windows actions during startup process.
Use these features to manage (enable/disable, edit command, delete) applications loaded during startup process.
1.AutoRun Editor for Current User
This is a list of applications that Windows automatically runs every time you login (User-specific). You can use this feature to enable/disable those applications, modify application paths, or delete them from the list. The list may vary between different user on the same computer.
2.AutoRun Editor for Local Machine
This is a list of applications that Windows automatically runs every time you turn on your computer. This feature is similar to the Current User AutoRun List Editor. The difference is this feature is not user-specific (every user will autorun these applications).
To change the picture Windows loads when starts up, just filláthe field or browse the file and then press OK button. NOTE: picture must be in BMP format with dimension of 320x400ápixels and color depth of 256.
Use this feature to modify Window's behavior during startup.
Use this feature to modify Window's behavior during startup (Advanced Options).
You can enable/disable disk compression setting with this feature. WARNING: Disable either disk compression only if you are sure thatáyou are not using disk compression. Doing so while using disk compression will cause your files inaccessible the next startup.
This feature lets you schedule Disk Defragmenter. You can set so that Defragmenter runs every time you starts Windows, runs only the next start up process or doesn't run during start up process.
Key Delay is the amount of time (in seconds) Windows waits and displays "Starting Windows9x....". Boot Menu Delay determine how long Boot Menu (if you activate it) should be displayed before running the default option.
This setting is best used with SCSI-Harddisk systems, because double-buffering doesn't effect IDE/ATA HD performance and thereforeáthis setting should not be changed to those who use IDE/ATA HDásystems.
Legal notice popup is a message box displayed each time a user logon. You can set it with this option. To disable legal notice popup, empty the fields and press OK button.
Option 1 (if enabled/checked) will allow user to bypass Login dialog box whenever user starts Windows. Option 2 is used to limit the number of automatic logins. Option 3 forces the machine to auto logon and to ignore any bypass attempts. Option 4 controls whether users are required to press Ctrl+Alt+Del as a security precaution before logging into the system. NOTE: With option 1 enabled, user will be automatically logged on as administrator, so this option should not be enabled on a multi-user computers.
Enabling option 1 will ensure that logon script was completely finished before launching Windows Explorer as System Shell. Enabling option 1, however will also slows down desktop appearance. Option 2 can be used to hide/show Windows NT 4.0 script commands during the startup process (by default, any Windows NT 4.0 or earlier script command will be displayed in command box while Windows 2000/XP script command will be hidden).
If the computer was not properly shut down (according to Windows), by default, Windows will check for harddisk integrity the next timeáit starts. You can modify this behavior in this feature. WARNING: You should try to avoid disabling Scandisk as possible.
To show Welcome Windows every time the Windows starts, check the box. If such greeting starts to annoy you, just uncheck the box.
 System Other Options
These are other system settings that you can modify
Application Path Editor
Some applications can be run simply by entering the filename in the "Run..." command without specifying full path. Windows can do this by using its application path. Application path is what Windows uses to look for if it cannot find the application file in Windows folder, Windows\System folder or in the %PATH% environment. If you want to add the application path list, activate the form , click the "Add New" button, and enter the application's file name (must include full path).
Command Prompt AutoComplete
If the first option enabled, pressing TAB key will autocomplete command lines (much like autocomplete in Internet Explorer URLs path). You can disable this option so that pressing TAB key will only move cursor to next tabular column. Option 2, almost like option 1, but it will make path autocomplete in command lines by pressing CTRL+D key.
Ctrl-Alt-Del Options
If option 1 is unchecked, user will not be able to start Task Manager. Option 2 to 4 can be used to enable/disable some Task Manager's features.
DOS High Memory Area
If you need more conventional memory (first 640 KB of your RAM) for your old DOS-based applications (e.g. DOS Games), you can enable this option. Enabling this option will load part of O/S to High Memory Area, thus freeing more conventional memory.
Driver Search Locations
You can modify the locations that Windows searches for drivers. Normally, if Windows needs new driver installation, it will first search its local installation, then Windows will search in floppy drives, CD-ROM drives, and Windows Update. For example: if you don't want Windows to search for driver in Windows Update, you can uncheck "Search Windows Update" option (after activating the form by double-clicking one of the items in the list on the right).
Two-Digit Years Interpretation
Use this feature to determine how applications interpret two-digit years. Maximum year is the largest value that can be interpreted as year 20XX. For example: if you set this value to 2023 then two-digit values range from 00 to 23 will be interpreted as year 2000-2023, while year 24-99 will be interpreted as year 1924-1999). To reset to default value (maximum year: 2029), just empty the box and click OK button.
Owner/Company Information
This feature can be used to change some user information that Windows gathered during installation process. Simply fill the boxes and press OK Button.
Uninstall Editor
You can use this "uninstall editor" to modify program's name, program's command line or even delete an item in the Uninstall List in the Control Panel-->"Add/Remove Program" section. NOTE: This feature does not uninstall any program. This featureásimply serves as uninstall list editor.
Registry Files Action on Double Click
Registry files (*.reg) usually can be merged with your Windows Registry automatically by double-clicking them. However, you might want to change this behaviour, so that double-cliking registry files will only view its contents instead automatically merge its contents. To set default action, choose one from the list and click OK button.
 COVERING YOUR TRACK
Use this feature to protect your privacy. This feature will help you to remove your most recently data. It will cover your track, so no one will know what you have done on this computer.
Options
This section contains many useful options that can protect your privacy and your data.
Options List 1
If you don't want to display the last username that entered this computer, checked on option 1. Option 2 will prevent the computer to make recent document's history. And option 3 will prevent saving shortcut to recently used documents in Start Menu. Option 4 will delete the cached profile of any roaming users when they log off the system. This will help to maintain profile integrity and save disk space where that are numerous mobile users. Option 5 is used to limit the number of automatic logins.
 Clear Explorer History
Protect your privacy by deleting explorer history. In this section you will be able to delete the history by selecting it from the list. To make the protection more robust, checked all list.
Explorer Clear List (1)
Explorer clear history list (1).
Explorer Clear List (2)
Explorer clear history list (2).
Explorer Clear List (3)
Explorer clear history list (3).
 Clear IE History
Protect your privacy by deleting internet explorer history. In this section you will be able to delete your IE cookies, IE history, and IE temporary Cache.